Key Points
- To design a gym layout or floor plan that works well in 2026, make sure to consider current trends, member journeys, training demand, and peak-hour flow.
- Anchor your floor plan around strength training zones, which represent over 40% of member demand according to ABC Fitness market data. Allocating primary square footage here directly aligns your space with what members are willing to pay for.
- Shift from density-first thinking to purpose-driven zoning. Overcrowded floors frustrate members. Intentional zones, each with a clear function, drive the social fitness culture that research links to 56% higher retention rates.
- Integrate longevity and diagnostic spaces like recovery stations, body composition scanning, and mobility corridors to meet the 2026 consumer expectation that a gym supports whole-health outcomes, not just peak performance.
- Validate every zone using 3D design software before breaking ground. Tools like Planner5D let you stress-test traffic flow, lighting placement, and sightlines at zero cost.
- Conduct a live walkthrough simulation with staff acting as members across peak, mid-day, and off-peak scenarios, then refine bottlenecks before your layout is finalized.
Table of Contents
How to Conduct a Site Analysis and Vision Audit
The decisions you make in this audit phase lock in every constraint and opportunity that follows, so precision here directly determines your profit ceiling.
“Longevity is the next frontier for health… consumers demand integrated wellbeing solutions combining diagnostics, science, health and fitness.” — Anna Bjurstam, Les Mills
Use the checklist below to complete your site analysis before committing to any floor plan.
- Audit structural constraints: Measure ceiling heights, map pillar placement, and evaluate natural light sources that affect airflow and HVAC load.
- Define your Longevity Frontier: Identify where diagnostics, biometric screening, or science-led recovery services will live within the footprint.
- Calculate floor area vs. capacity: “At peak times in large gyms, the industry standard is between 25–35 sq ft per member,” Gymdesk recommends.
- Identify your primary revenue driver: Whether that is strength training, group fitness, or recovery services, this anchor dictates how every square foot gets allocated.
ODSI offers gym and health club site analysis services to evaluate your space, identify opportunities and constraints, and build a clear foundation for a high-performing fitness facility.
Step 1: Define Purpose-Driven Zones for Member Flow
- Map the Member Journey first. Trace the path from the entrance to the locker room on paper before touching anything else. Intuitive navigation reduces friction. When members move effortlessly between zones, dwell time increases and frustration drops.
- Allocate at least 40% of floor space to strength and resistance zones. Modern gym layouts are moving away from “maximum density” to purpose-driven zoning specifically to reduce peak-hour congestion and improve member flow. Strength areas anchor that philosophy.
- Designate a dedicated Social Zone for group fitness. Members who participate in group fitness classes have a 56% higher retention rate. Position this zone where natural light and sightlines from the entrance create immediate visual appeal.
- Create a Recovery and Diagnostic wing away from high-decibel areas. Stretching, foam rolling, and biometric assessment stations require calm acoustics. Placing them adjacent to cardio banks or free-weight platforms undermines their value.
- Label zones clearly in your floor plan. Use distinct flooring colors or textures to reinforce zone boundaries without relying solely on signage.
- Validate the layout against peak-hour traffic. Simulate member movement at your busiest hours. Bottlenecks near water fountains or transitions between zones reveal a need to redesign before construction begins.
Key stat: The social fitness culture that research links to 56% higher retention rates means your Social Zone is not an amenity, it is a revenue line item worth prioritizing in your floor plan from day one.
Step 2: Optimize the Strength Training Anchor
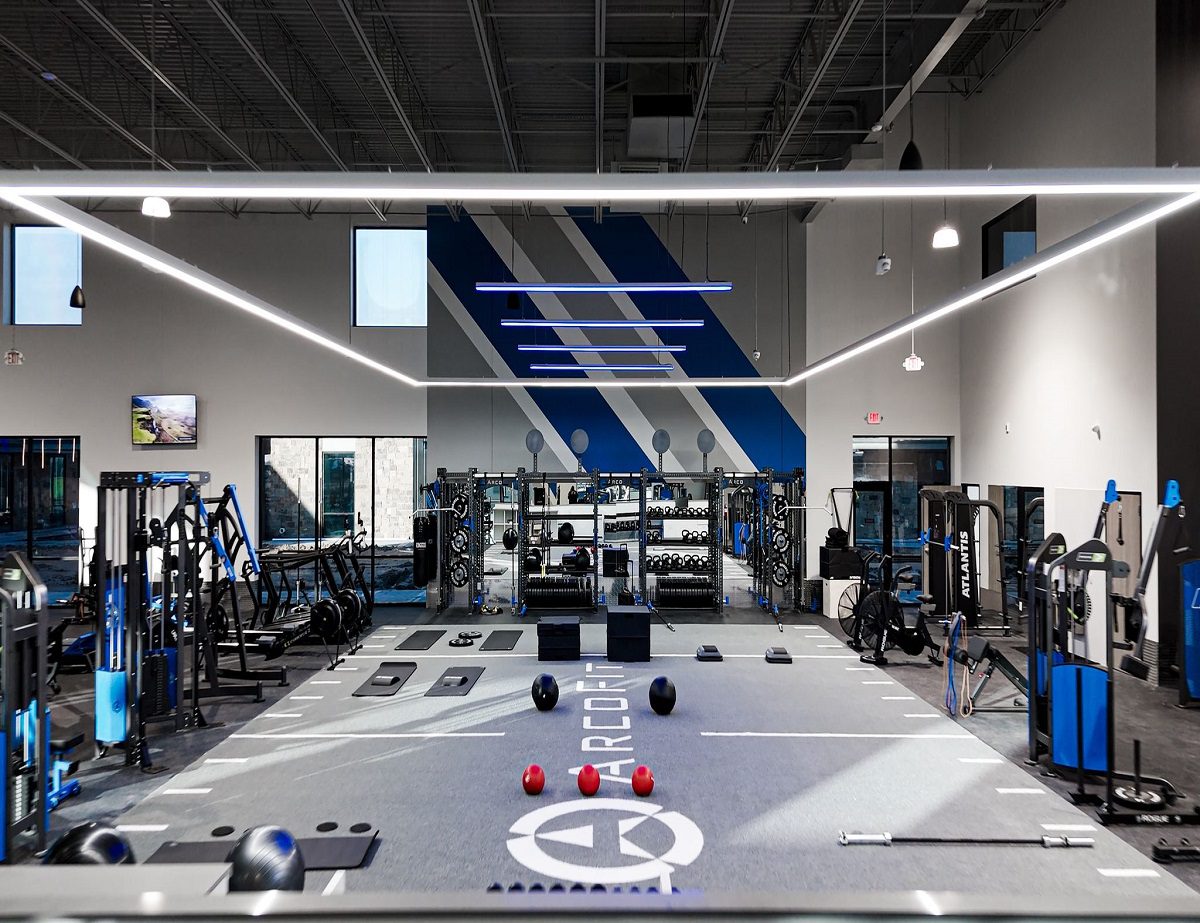
- Position power racks and free weight stations as the visual centerpiece. Place them toward the back or a prominent interior wall so they anchor sightlines from the entrance. This signals serious training capacity immediately upon entry.
- Establish 360-degree clearance around every resistance system. A common pattern is to allocate a minimum of 3 feet on all sides of each rack, with 6 feet behind barbells to accommodate safe coaching and spotting without crowding adjacent users.
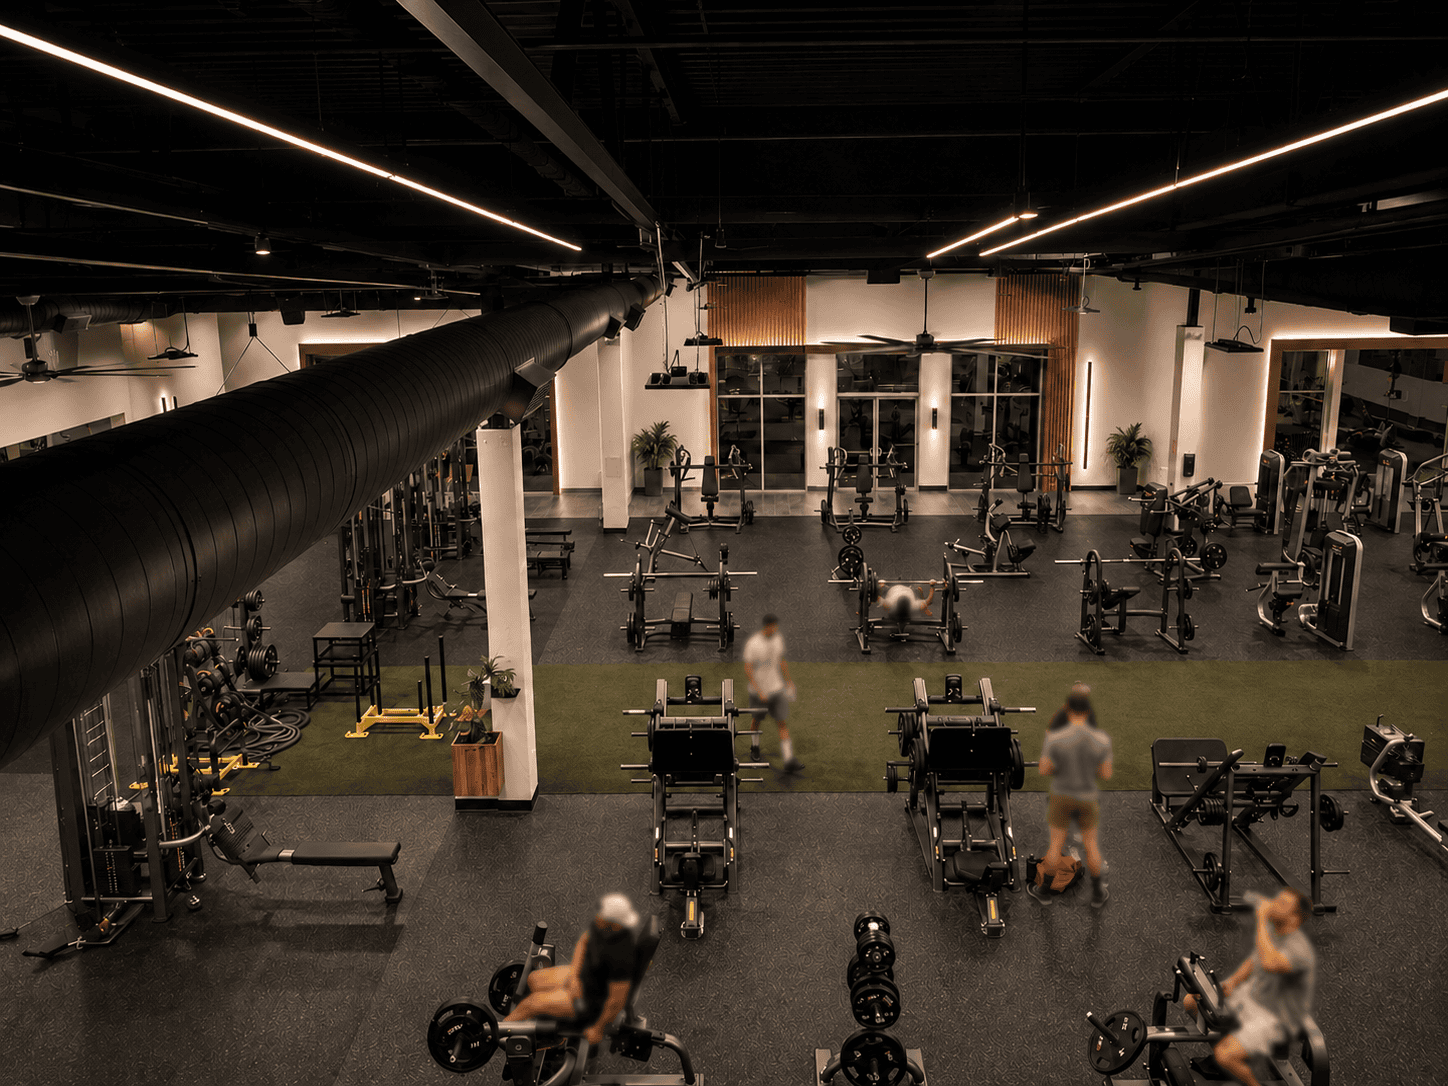
- Choose purpose-matched flooring for the entire strength zone. High-density rubber tile or rolled rubber at 3/4-inch thickness handles Olympic drops while absorbing sound that would otherwise bleed into stretching or recovery zones nearby.
- Balance machines with open turf corridors. Positioning a turf lane alongside plate-loaded machines gives members space for sled pushes, farmer carries, and functional movement.
Designer’s Tip: Use darker flooring tones in the strength zone to visually define the area and reduce the appearance of chalk and rubber dust between cleanings.
Step 3: Select a Professional Gym Designer
- Choose a designer with specialized fitness-industry experience. Fitness facilities have unique planning requirements that extend well beyond creating an attractive floor plan. Look for a designer who understands equipment dimensions, safety clearances, accessibility, member behavior, and the operational needs of different fitness and wellness environments.
- Evaluate how the designer approaches member flow and zoning. A professional gym designer should create intuitive transitions between cardio, strength, functional training, group exercise, recovery, and support spaces. Thoughtful circulation reduces congestion, improves sightlines, and makes the facility easier and more enjoyable to use.
- Confirm that the designer coordinates equipment and building systems. Equipment placement must be planned alongside lighting, power, mechanical, plumbing, acoustics, and structural requirements. Early coordination helps prevent conflicts, expensive field changes, and delays during construction and installation.
- Select a designer who plans for operations and future growth. A successful gym must work well on opening day and remain adaptable as equipment, programming, technology, and member expectations evolve. An experienced designer considers staffing, maintenance, revenue opportunities, equipment replacement, and long-term flexibility throughout the design process.
Step 4: Integrate Lighting and Aesthetic Branding
Commercial gym design in 2026 places heavy emphasis on “wowing” clients through integrated wellness aesthetics and biophilic elements, meaning the atmosphere you create is no longer a finishing touch but a retention strategy.
- Install circadian lighting systems that shift color temperature throughout the day, with cooler, energizing tones during morning peak hours and warmer tones for evening recovery sessions. This approach supports member performance and signals that your facility operates with intentional, science-backed design.
- Introduce biophilic design elements like living walls, natural wood accents, or stone textures to soften the hard industrial character of a strength zone. Even modest greenery near free-weight areas measurably reduces perceived stress and improves the training atmosphere.
- Embed branding into the architecture itself rather than relying on printed signage applied after construction. Colored epoxy flooring, branded turf lane colors, and custom mirror trim create identity that feels intentional rather than cosmetic.
- Treat acoustics as a design material. Ceiling baffles, rubber flooring, and strategic wall paneling control reverb without eliminating the social energy that keeps members engaged. Noise fatigue is a documented driver of membership cancellation.
How to Design a Gym Layout: Finalize & Validate
- Conduct a Peak Hour Simulation with your staff by walking through the 3D model at projected maximum capacity. Mark every movement path and identify any chokepoints where members would cross paths or compete for equipment access. Adjust spacing until traffic flows without friction.
- Verify compliance by confirming all aisles meet the ADA-required 36-inch minimum clear width requirement and that accessible routes connect every zone, including restrooms and the entrance.
- Trace all emergency exit paths within the model to confirm they remain unobstructed by equipment, storage, or décor elements. Local codes typically require exits to be reachable within a defined travel distance.
- Finalize your equipment list based on the exact square footage confirmed for the strength zone, adjusting quantities to match real available space rather than estimates.
- Review the completed plan with a design consultant or operational consultant to validate across all aspects. Consulting with experts like ODSI ensures wellness spaces are strategically optimized for long-term business success, not just aesthetics.
Need Help Designing a Gym Layout?
Optimal Design Systems International brings the experience of 30+ years and more than 1,000 fitness facility design projects to every layout plan.
Whether you need help understanding how to maximize member flow in a fitness center or help with gym layout and space planning for a new club, our award-winning team has got you covered.
To get in touch, just call 954.888.5960. You can also click here to schedule a consultation with us.
Join the Journey!